Overview:
Once you have created an invoice in EdgeCTP and copied it to Xero, you may want to cancel the invoice by issuing a Credit Note in EdgeCTP and copying that to Xero too. Again this is relatively simple to do. Just make sure you’ve first connected EdgeCTP to Xero and we’re good to go.
In this post you’ll learn how to:
- Create a Credit Note in EdgeCTP to cancel an existing Invoice
- Create a Credit Note in EdgeCTP just to credit a client’s account
- Copy and view the Credit Note in Xero
How to Create a Credit Note in EdgeCTP
The following is a brief step-by-step guide that shows how to create a Credit Note in EdgeCTP.
Create a Credit Note to Cancel an Existing Invoice
EdgeCTP allows you to create a Credit Note to cancel either a Standard Accounts Invoice or a Commercial Invoice (usually used when trading internationally). Remember that an invoice that has been authorised and copied to the accounting package (Xero) or sent to the client, needs to be cancelled with a Credit Note.
TIP: If you have NOT copied the invoice to the accounting package NOR sent to the client, then you can simply cancel the Invoice WITHOUT a credit note.
Example assumption: If you want to follow along with the example below, where we’ll create a Credit Note to cancel an existing invoice that has been copied to Xero, then we’re assuming that you’ve already got an invoice that you’ve copied to Xero, and now you want to cancel it with a credit note.
Find the Invoice to Cancel in EdgeCTP
Login to your EdgeCTP account and make sure you have the correct user role (Creator or above, i.e. ‘Auditor’ user roles cannot create documents).
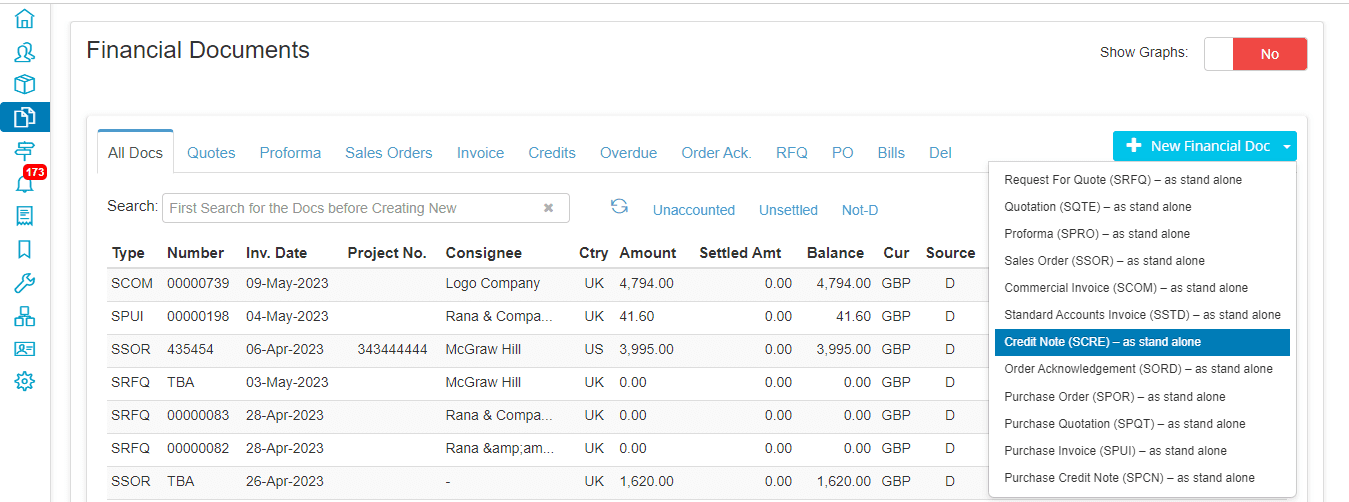
- From the home dashboard choose from the tab: Docs & Certs > Financial Documents
- The ‘Financial Documents‘ dashboard will appear
- Now look for the invoice you wish to cancel with a credit note, a quick way to do this is to use the Search field and typing in the invoice number you wish cancelled

Search for the existing Invoice to Cancel with a Credit Note
- Click the Edit (Pencil) Action icon to bring up the Invoice that you wish to cancel with a credit note. Notice that the Acct. flag of ‘Yes’ means that invoice has been copied to the Accounting Package (i.e. accounted for), this then means you’ll also need to copy the credit note to the Accounting Package to align the accounting balances
Cancel the Existing Invoice with a Credit Note in EdgeCTP
- Once the invoice appears, and you’ve confirmed it is the correct invoice you wish to cancel with a credit note, then click [Cancel with Credit Note]
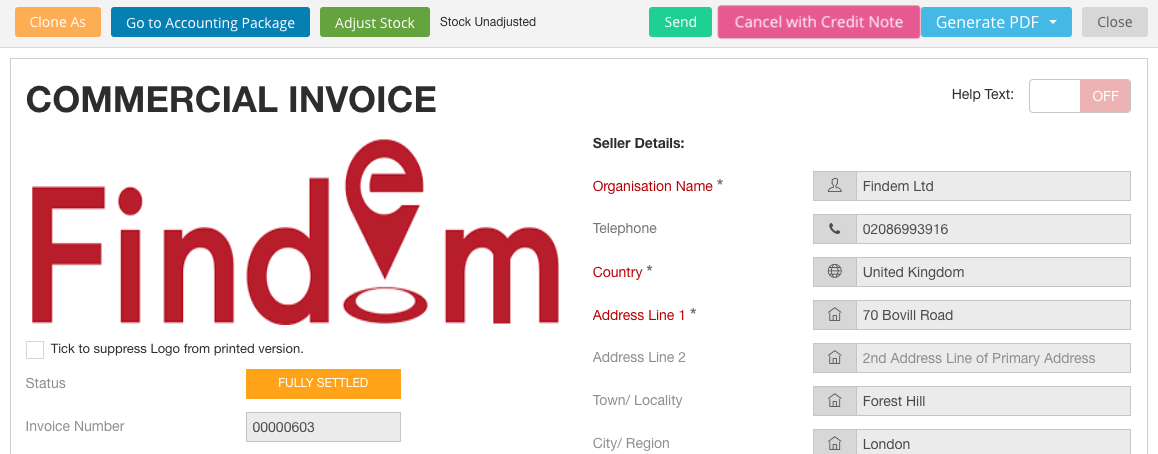
Confirm this is the invoice then Click [Cancel with Credit Note]
- A Warning and Confirmation dialogue box will appear asking you to confirm you wish to cancel the invoice. If you’re certain then click [Yes, I’m sure – do it]
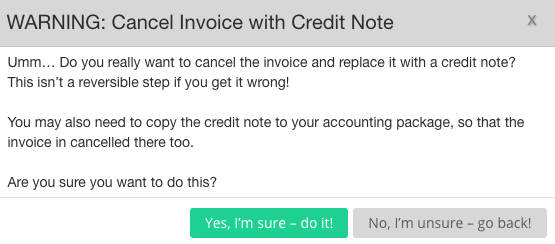
Confirm correct invoice is being cancelled with a Credit Note
- The system will then prepare a Credit Note, which mirrors the original Invoice
- Review the Credit Note, check the Ref Inv. (next to the Credit Note Number field) and the negative Credited Total to reflect the Invoice amount being credited
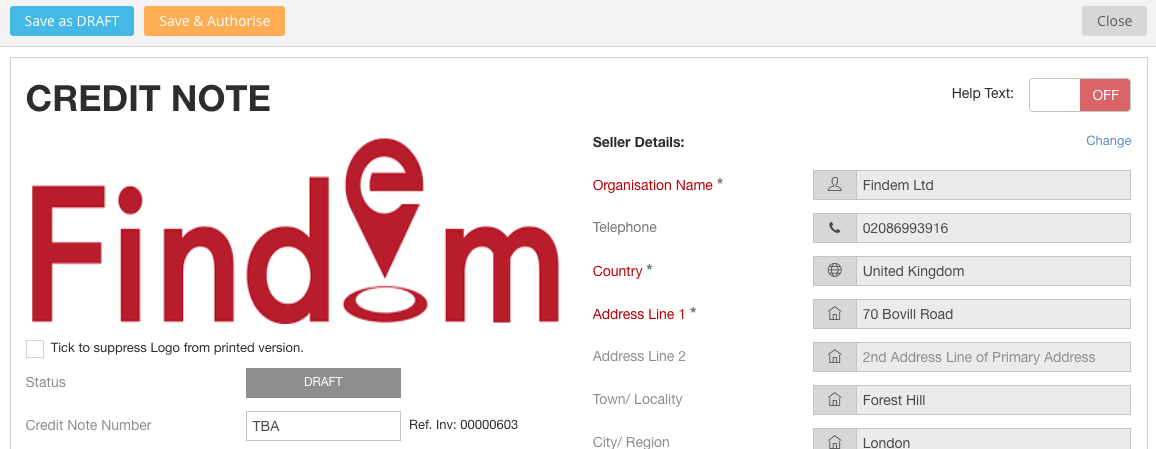
Note: Ref. Invoice No. being cancelled with the Credit Note

Note: Negative Credited Total
- Once reviewed click the [Save & Authorise] button, and the system will ask for another Warning confirmation, which you click [Yes, I’m sure – do it!] button
- The system will then process the Credit Note to assign a Credit Note Number and set the Status to ‘Authorised’, and the original Invoice is now Cancelled
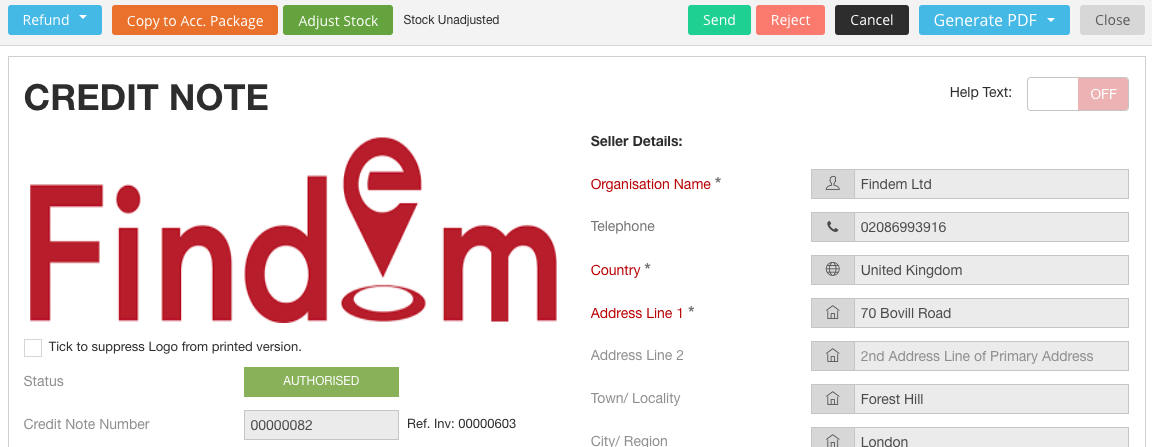
Authorised Credit Note ready for copying to Accounting Package
How to Just Create a Credit Note in EdgeCTP
In some cases, you just want to create a Credit Note, which is NOT related to an invoice cancellation, e.g. you simply wish to give credit/money back to a client. You do this simply by:
- From the Home dashboard > Docs & Certs > Financial Documents to show the Financial Documents dashboard
- Click [+ New Financial Doc] button and choose Credit Note from the drop-down menu
- When the Credit Note appears, complete the required fields – mandatory fields have red headings with asterisks
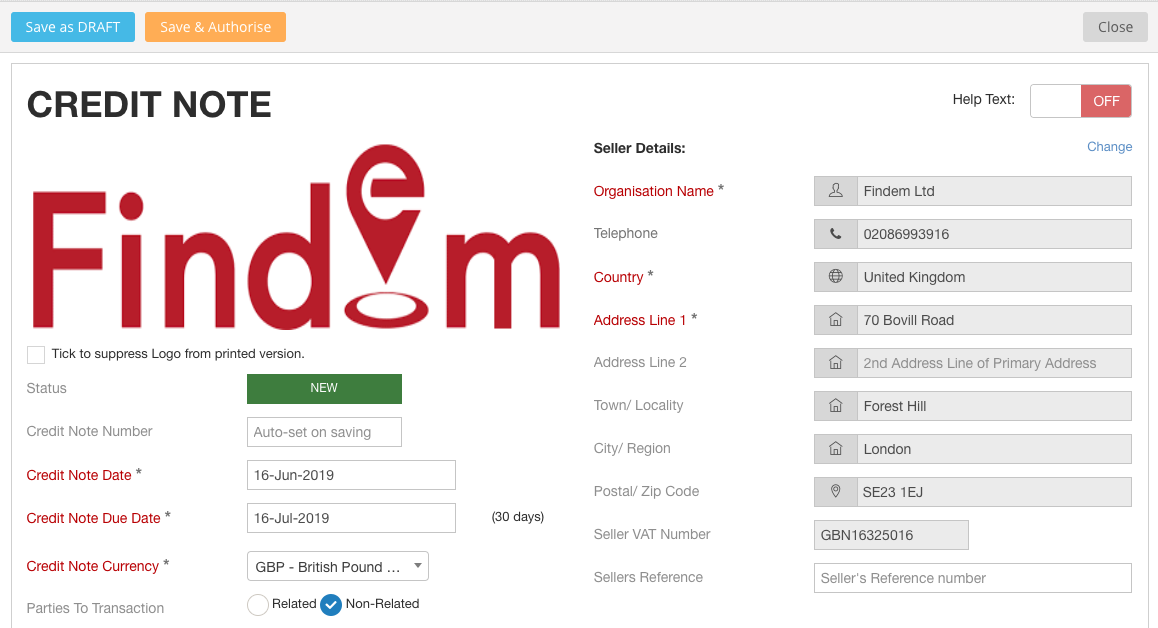
Complete the necessary fields in the Credit Note (use Help Text if required)
- Once you’ve completed the Credit Note, click the [Save & Authorise] button
- The system will then process the Credit Note to assign a Credit Note Number and set the Status to ‘Authorised’
Copy the Authorised Credit Note to Xero
- With the authorised Credit Note visible/open, click the [Copy to Acc. Package] button to copy the Credit Note to Xero, and when the system asks for a confirmation, just click the [Yes – Just Do It!] button
- The system copies the Credit Note to Xero and returns with the [Go to Accounting Package] button now available
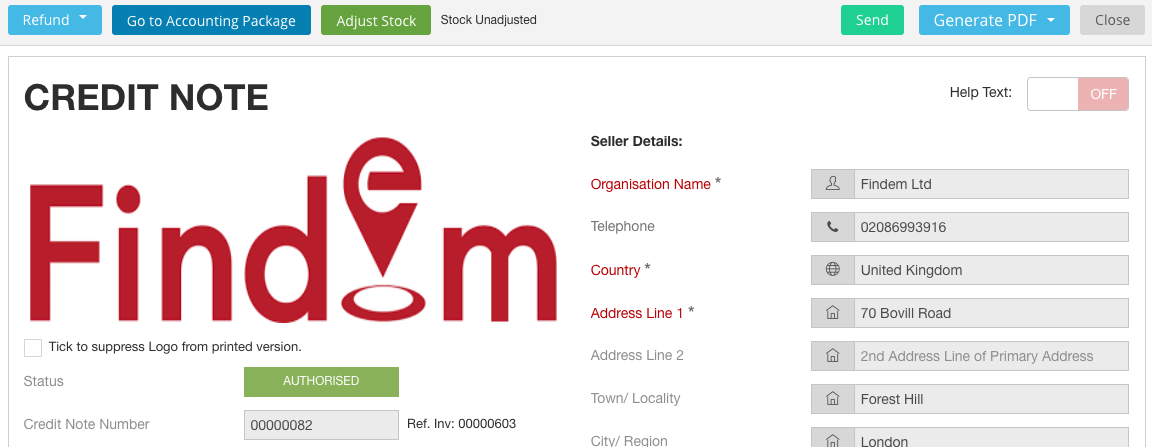
Credit Note in EdgeCTP copied to Xero
- To see the Credit Note in Xero, click the [Go to Accounting Package] button, which opens the Xero version of the Credit Note in a new browser tab (if you need to login to Xero, do so as requested)
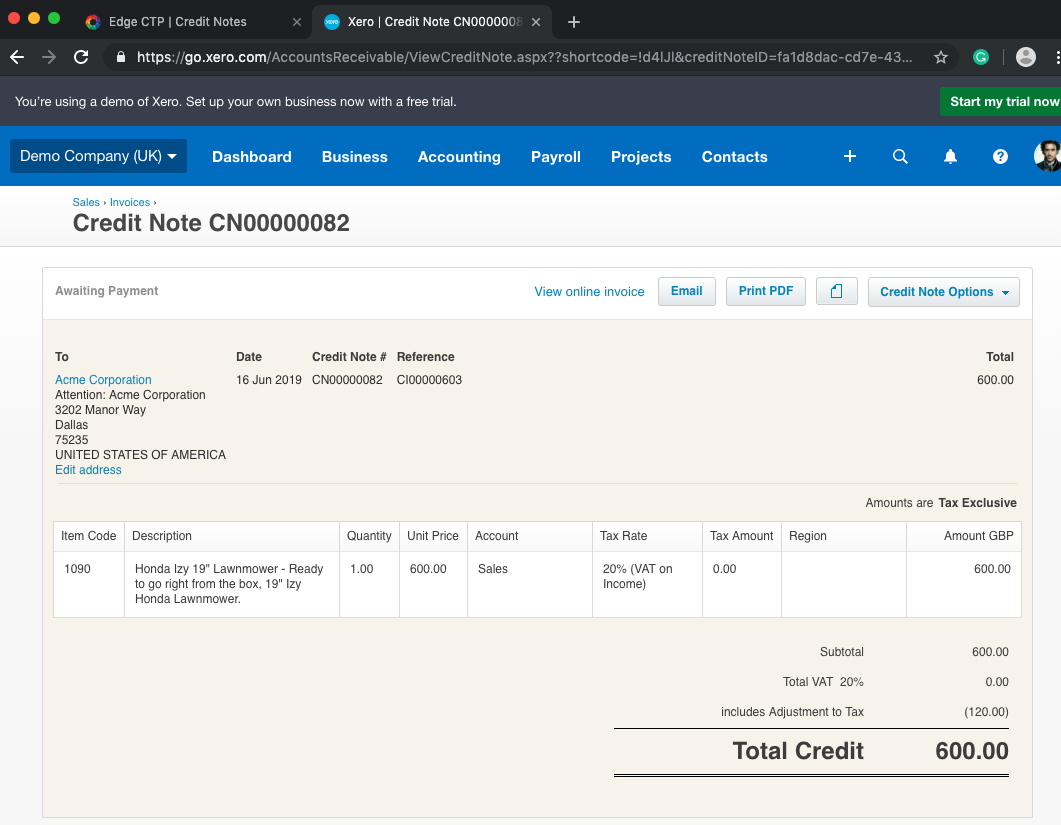
Credit Note copied into Xero from EdgeCTP
Refund a Credit Note in Xero
- With the Credit Note already in Xero, and if the original invoice (being credited by the Credit Note) was Fully Settled, as in the case of the example above, then you can simply make the physical cash refund within Xero, and automatic synchronisation between Xero and EdgeCTP will reflect the Credit Note refund in EdgeCTP. Do the following steps:
- Open the Credit Note in Xero and scroll towards the bottom of the note for the Make a Cash Refund section
- Check the Amount is correct (for a full refund, leave the amount equal to the Total Credit amount; for a part refund, set the amount less than the Total Credit amount)
- Set the Date of the cash refund
- For Paid From, select the account from where the monies will be refunded
- Add (optional) any Reference you wish to add for the refund
- Click [Add Refund]
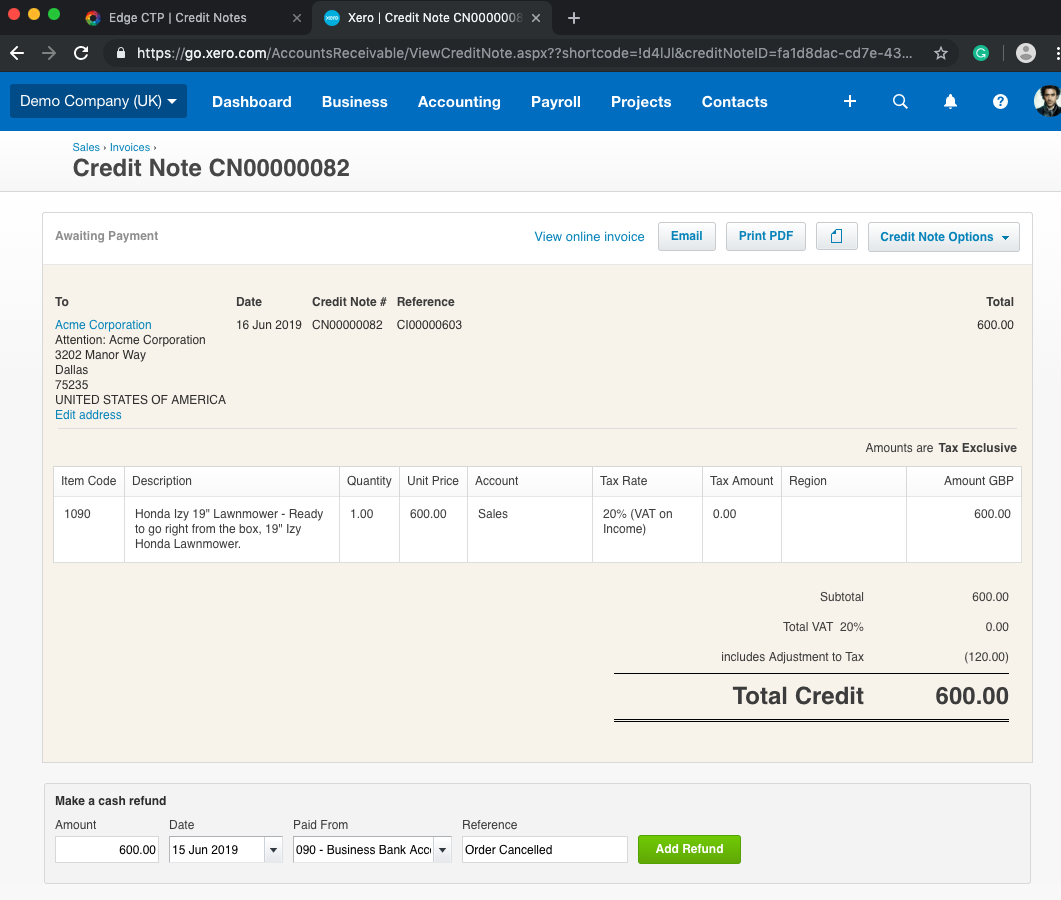
Refund Credit Note in Xero
Reflecting Xero Credit Note Refund in EdgeCTP
If a Credit Note had been refunded within Xero (rather than within EdgeCTP first, as per the example above) then you can see the refund reflected back on EdgeCTP.
- To see the refunded Credit Note amount in EdgeCTP, simply click on (jump back to) the EdgeCTP tab in your browser (or login to EdgeCTP if you’d logged out and navigate to the Financial Documents dashboard)
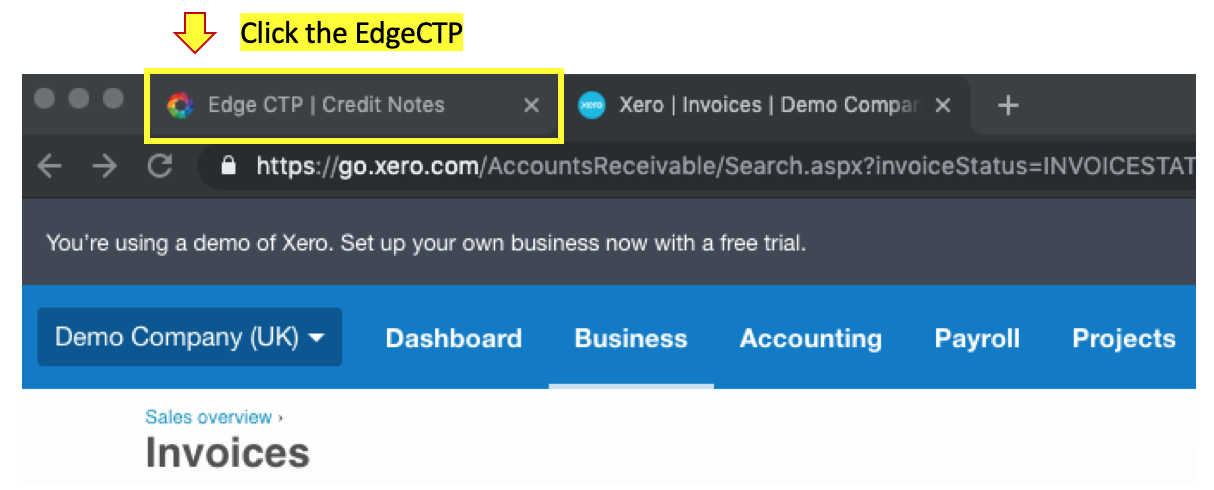
Switch back to EdgeCTP Credit Note
- If the Credit Note in EdgeCTP is open then you can simply refresh the browser display by clicking the Reload Page button to synchronise the Credit Note with Xero and reflect the Credit Note amount and status within EdgeCTP
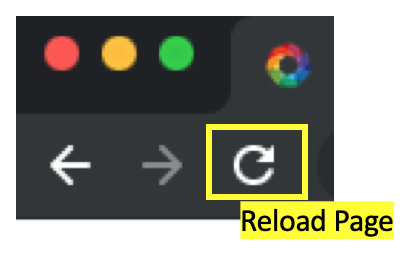
Click Reload Page Button
- If the Credit Note in EdgeCTP is NOT open, then either use the refresh or synchronise icons on the Financial Documents dashboard, or simply open the Credit Note and the system will automatically synchronise the Credit Note between EdgeCTP and Xero. In all cases, the Financial Documents dashboard reflects the updated and synchronised status for the Credit Note

Synchronised Amounts and Status between EdgeCTP and Xero
How to Get a PDF or Printed Credit Note
If you wanted to get a credit note in PDF (for electronic emailing) or printed (for posting a paper copy) versions to clients, then simply:
- Open the Credit Note from Home > Documents > Financial Documents and find the Credit Note you wish to print/PDF
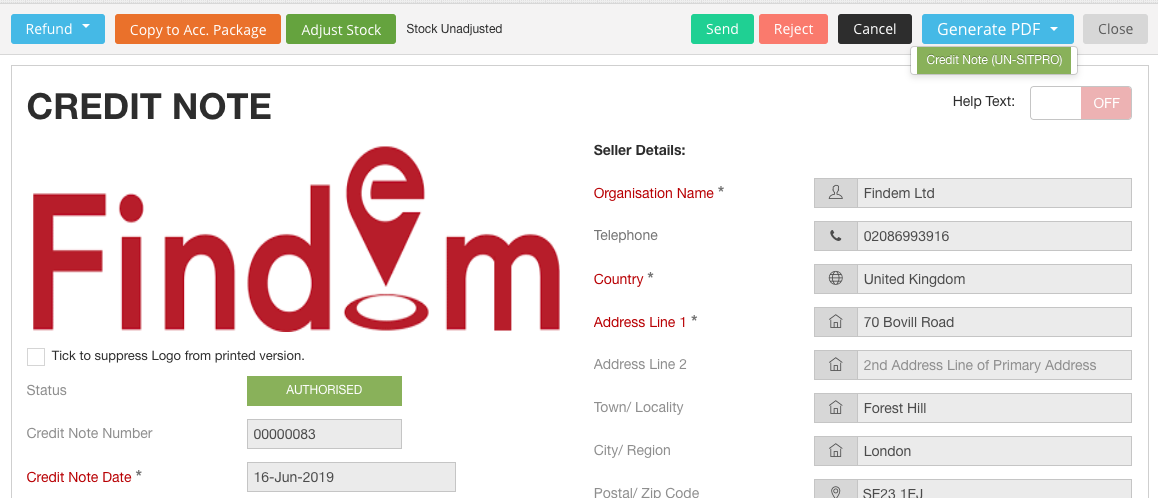
Use [Generate PDF] to get an email or printable Credit Note
-
- Click [Generate PDF] and choose Credit Note (UN-SITPRO)
- The system will download the PDF version of the Credit Note to your local device/computer
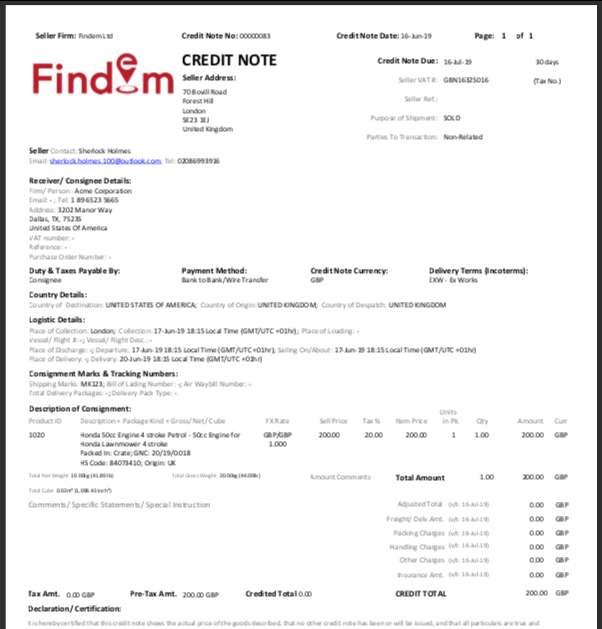
PDF version of Credit Note in EdgeCTP
- Use the PDF version to email or print on paper


