In this tutorial blog we’ll cover the following scenario:
- Entering customer details
- Raising and sending a Quote
- Converting the Quote to a Proforma Invoice (via an associated Sales Order)
- Raising POs for the particular job (for stock and transport separately)
- Receiving in stock and allocating to the earlier Sales Order
- Confirming the Sales Order and sending the final invoice
Entering Customer Details
EdgeCTP comes with Customer Relationship Management (CRM) functionality built in. When creating new customer details, you have two choices by entering the details:
- directly into the CRM or
- onto the face of the document(s) you’re creating e.g. Quotation, and EdgeCTP will simultaneously enter them into the CRM for you
CRM: Creating a New Customer
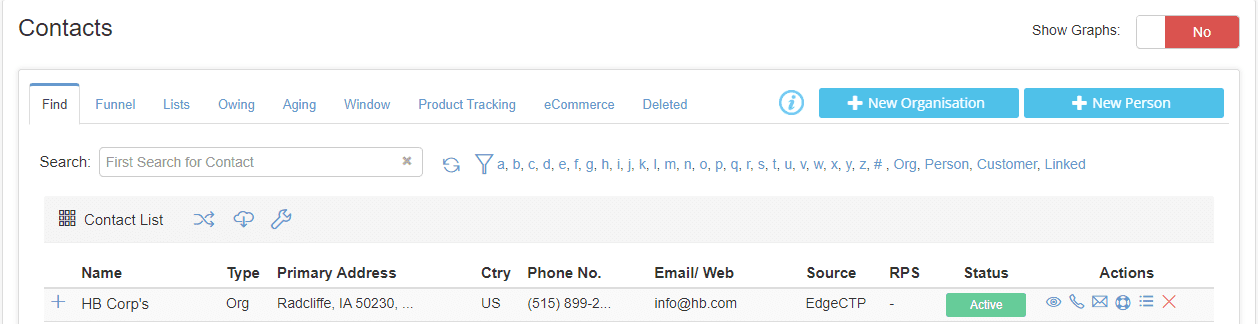
- From the Home dashboard, choose Contacts from the menu tab.
- From the Contacts dashboard, click the either the + New Organisation or + New Person In this example, we’ll create a new organisation
- Mandatory fields have red heads with asterisks. For organisation, you only need to provide two fields of information: Organisation Name and Organisation Category. The remaining fields are optional and can be left blank. Add as much or as little information as needed. Ideally, the Name, Category, Address and Contact number(s) are good to add
- Type in the Organisation Name. Google searches will assist you to find the actual contact (organisation) and if found will populate the relevant details + add logos etc.
- Select in the Organisation Category e.g., Customer
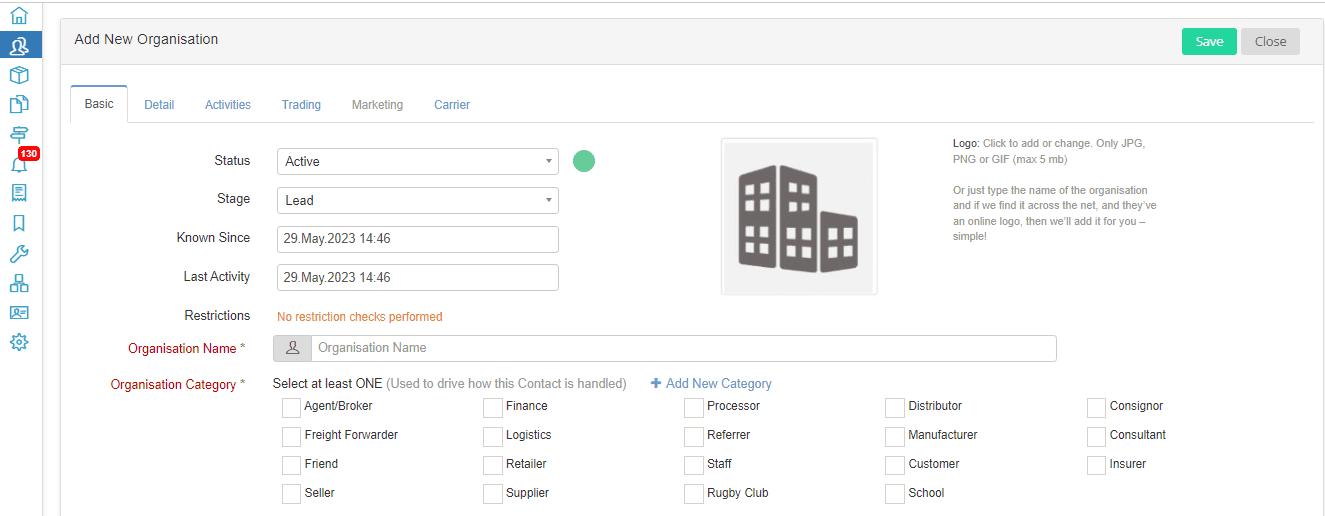
- Add any contact details that you need, e.g.:
- Details > Connect and add the contact Telephone + Email address
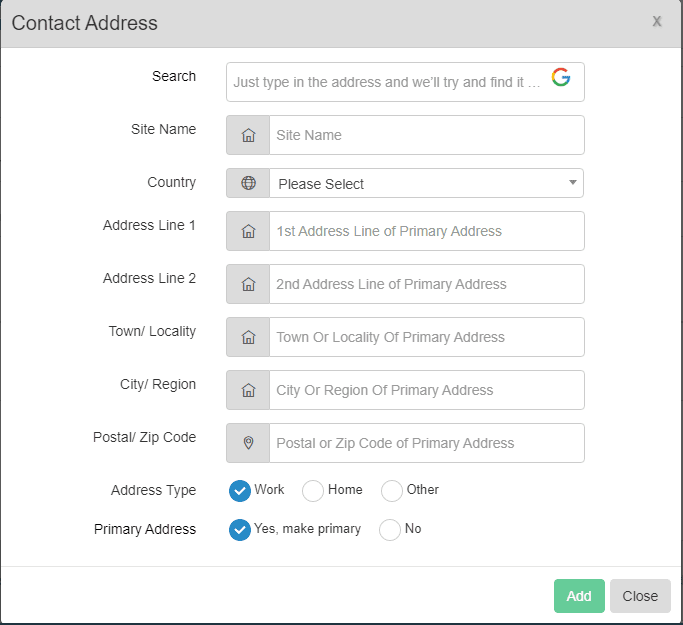
- Details > Address and + New Address and add the relevant postal address(es) and click the [Add] button
- Add any other relevant details that you need for the Contact
- Once you’ve added all the details you need, click [Save]. If EdgeCTP warns you about potential duplicates, consider the other matches found. If the newly created contact is not a duplicate, just click the [Yes, just save it] button and then click the [Close] button
- You’ll return to the Contacts dashboard, where the newly created Contact appears top of the table list
Raising and Sending a Quote
If you have a new customer enquiry and Request For a Quote (RFQ), then you can simply create the quotation and the new customer is automatically created from details entered on the face of the quotation. That is, where is NO need to FIRST create the customer (i.e., previous section of this blog). However, if you’ve already created the customer, then that customer will automatically appear on the new quotation (as a selectable choice).
In this blog example, we’ll assume that the customer has already been created, so you’ll just select the relevant customer when creating the quotation.
Creating a new Quotation
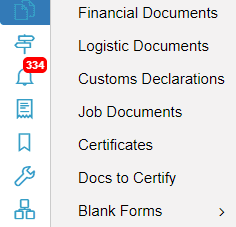
- From the Home dashboard, choose the Docs-n-Certs menu tab and then select Financial Documents to show the Financial Documents dashboard
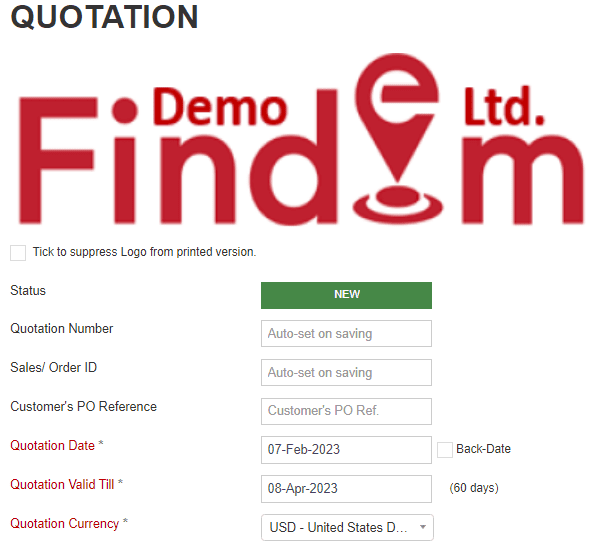
- From the Financial Documents dashboard, choose + New Financial Docs > Quotation (SQTE) – as stand alone, to show the Quotation document
- Complete the Quotation. Only the fields with red headings + asterisks need to be added, all other fields are optional. Suggested sections to complete are:
- Quotation Dates + Currency – make sure that the Quotation Date, Expire Date and Quotation Currency are correctly set
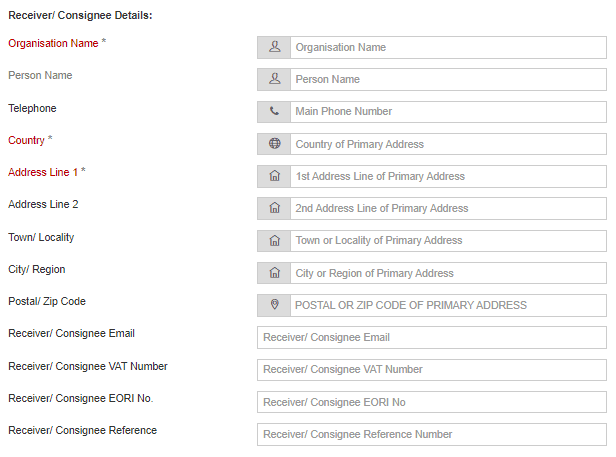
- Receiver/Consignee Details – just type the Organisation Name. As you type, EdgeCTP will search if the Contact already exist and display it for you to simply choose the organisation/person. If the organisation/person does NOT exist, then simply complete this section and when you save the Quotation, EdgeCTP will also create the organisation/person in the CRM for use next time
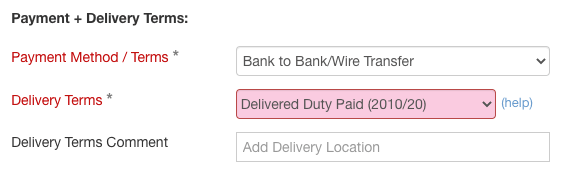
- Payment + Delivery Terms – it’s good practice to agree these during the quotation stage with your potential buyer. Specifically for international trading, set the Delivery Terms, where for you the ‘simplest’ would be EX-WORKS, where the buyer comes and collects the goods, and most ‘complex’ Delivery-and-Duty-Paid (DDP), where you deliver the goods to the buyer and cover all transportation and duty + taxes
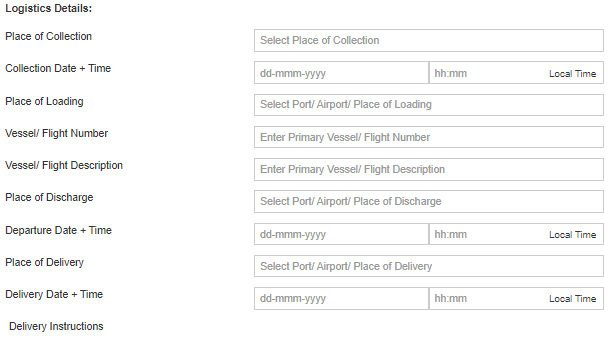
- Logistic Details – if you don’t know these are the time of the quotation, then click the Clear All link to remove the default entries
- Product Details + Description Lines – add as many product lines as needed for the quote. You will need to provide the Quantity for each listed product. If the product does NOT exist as a stock item, then simply type in the details in this section, so that when you save the quotation, EdgeCTP will automatically create the product in stock for next time. Also if the Sell Price is BELOW your profit margin and/or cost price then an arrow icon is shown – don’t worry the potential Buyer doesn’t get to see these arrows

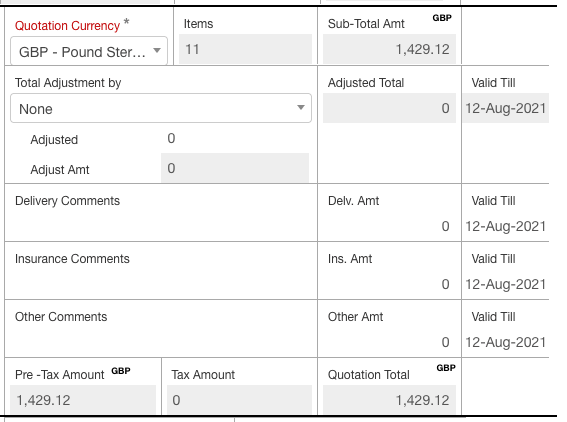
- Totals – check that the totals are correct. If not, adjust the Product Line values to reflect the impact on the Quotation Total. Add any other Amount items (e.g., Delivery Amount; Insurance etc.) as required
- Jump back to the top of the Quotation (you can use the black-n-white, jump up box in the bottom-right of the page) and click [Save & Authorise]. EdgeCTP will validate that all the mandatory fields have been completed correctly. If there are any omissions or error, they’ll be highlighted and you’ll need to fix them, before saving and authorising again. Add any comments and/or click the [Save] button
- The Quotation Status become Authorised and the buttons at the top change, to allow you to process the Quotation further
- Quotation Dates + Currency – make sure that the Quotation Date, Expire Date and Quotation Currency are correctly set
Generating a Quotation PDF
For an authorised quotation, EdgeCTP provides you with four layouts in which to produce a PDF (electronic printed document format) version. Please note that you DON’T need to generate a PDF in order to send/email it to anyone. You would generate a PDF simply to keep a copy locally for your records.
- Simply open an authorised quotation; click the Generate PDF button (top right) and choose one of the layout options:
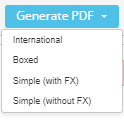
- Quotation (UN-SITPRO) – this is an extremely comprehensive quotation, usually used in international trade when United Nations (UN) standards is required
- Quotation (Simple) – this is a grid lined version with only the saliant fields shown
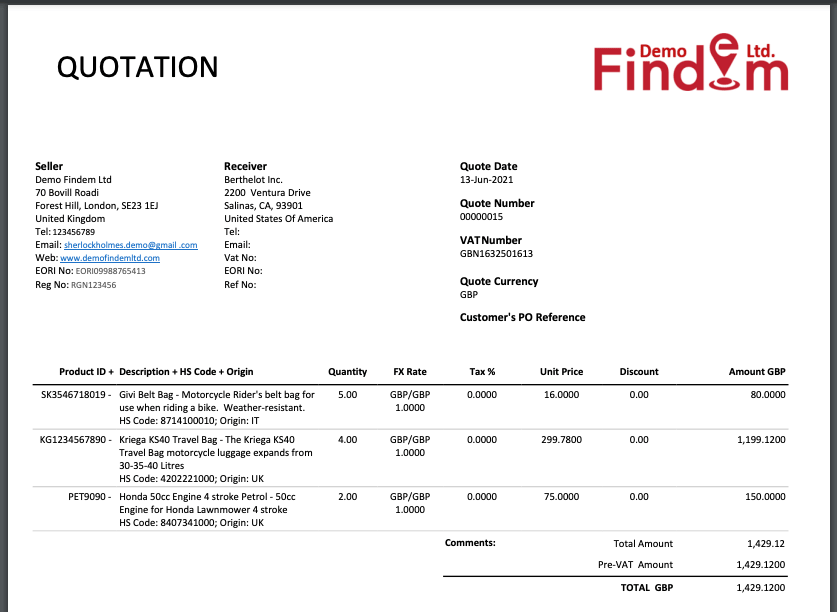
- Quotation (Std Acct.) – provides the quote in a generally accepted standard accounting format, including FX rates (if applicable)
- Std Acct (without FX Rate) – provides the quote in a generally accepted standard accounting format WITHOUT any FX rates being references
- After you’ve chosen a layout option, EdgeCTP will ask you a location you’d like to save the PDF file. Choose a location (if the Downloads directory isn’t preferred) and click Save
- Having saved the quotation locally, you can simply open it from the bottom of your browser window and click the PDF or go to the directory and open the PDF
- EdgeCTP shows the PDF version of the quote (usually in the browser or a PDF viewer)
Sending a Quotation
For an authorised quotation, EdgeCTP provides you with four layouts in which to send a PDF (electronic printed document format) version to email or digital recipients. Please note that this step automatically generates a PDF version and attaches it to an email for sending. You don’t need to do this as two separate steps. Additionally, you can “Email PDF” at any time.
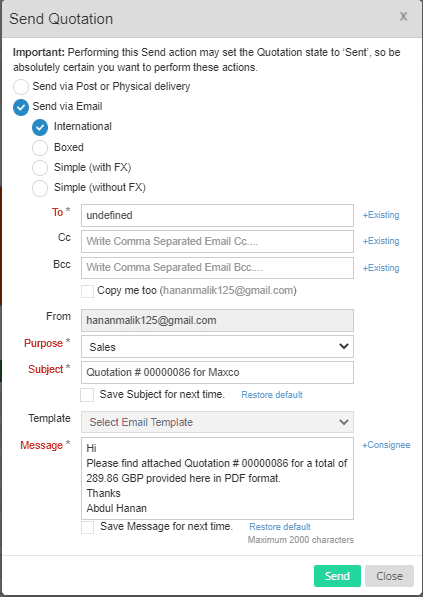
- For this scenario, open an existing authorised Quotation and click Actions > Send to show the Send Quotation dialog box

- The Send via Post or Physical Delivery is already selected. If you want to use the email option, choose Send via Email and the dialog box shows various email options to you. Complete the necessary fields:
-
- Choose the Quotation format (usually, Quotation (Std. Acct) is best)
- Add the email address (use +Existing to choose from available Contacts)
- Adjust the Subject and Message as necessary
-
- Click the Send button
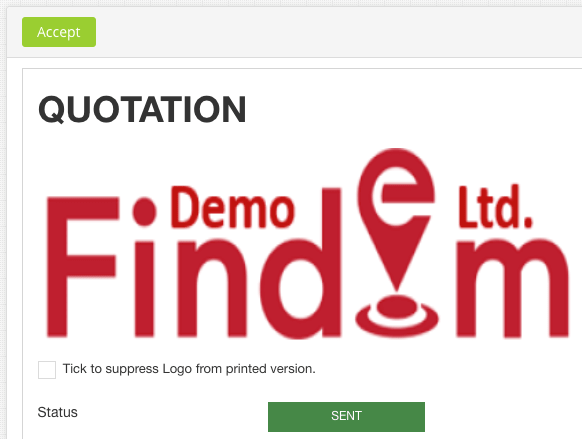
- Once the quotation is sent, the status is changed to ‘Sent’ to indicate that this quotation has been sent out, and an [Accept] button appears (top left), which you would click only once the quotation has been accepted by the buyer
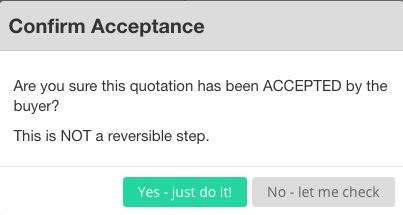
- In the event the quotation is accepted by the buyer, then open the sent quotation and click the [Accept] button to show a confirmation dialog box, click [Yes, just do it!] then [Save] to set the status of the quotation as accepted
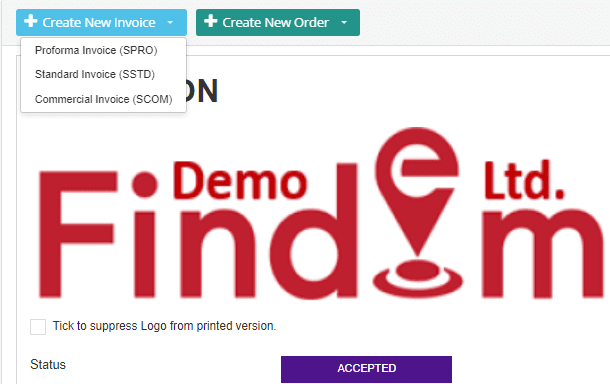
- With a quotation in an Accepted status, the + Create New Invoice and + Create New Order buttons appear, which allow you to process the quotation into two directions
- Create New Invoice – lets you create associated Sales Invoices from this Quotation
- Create New Order – lets you create Purchase Order and Sales Order documents from this Quotation

Creating a Proforma Invoice from an Accepted Quotation
Once a quotation has been accepted (Status = Accepted) then you’ve the ability to create an associated Proforma Invoice.
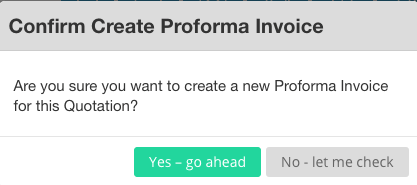
- Open a Quotation that has a status of Accepted and choose + Create New Invoice > Proforma Invoice (SPRO) and click [Yes – go ahead]

- EdgeCTP creates the Proforma Invoice; closes the Quotation and brings up the Proforma Invoice in Draft Please note that the Quotation now takes on a status of ‘Invoiced’ and you cannot create any further documents from the Quotation (i.e., process will continue from the Invoice and associated Sales Order from here on in)

- Check that the Proforma Invoice is populated correctly, and click the [Save & Authorise] button and [Save] to change the status to Authorised, which allows you to process the Proforma Invoice further
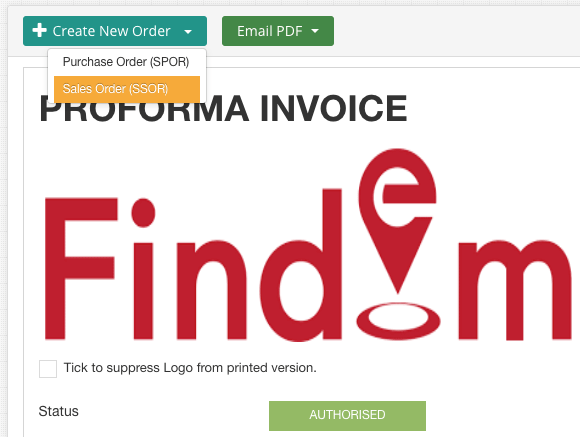
Creating a Sales Order from an Authorised Proforma Invoice
Once a Proforma Invoice has been authorised, you’ve the ability to create an associated Sales Order.
- Open a Proforma Invoice that has a status of Authorised and choose + Create New Order > Sales Order (SSOR) and when asked to confirm click [Yes, go ahead] to create the Sales Order
- The Sales Order is created and saved to the Financial Documents dashboard, close the Proforma and return to the Financial Documents dashboard, where the Sales Order (SSOR) should be the top document on the table with a Draft status (if you don’t see it, hit the refresh/recycle button next to the search field to force update the dashboard)
- Click the Action > Edit (pencil) icon to open the draft Sales Order in edit mode
- The Sales Order appears with ALL the information copied over from the Proforma Invoice, which saves you typing
- Check that the Sales Order is correctly populated, (optionally, you may want to set the accounts to where the product lines will post once the Sales Order becomes an invoice) and then click the [Save & Authorise] button and click [Save] for the Confirmation dialog box
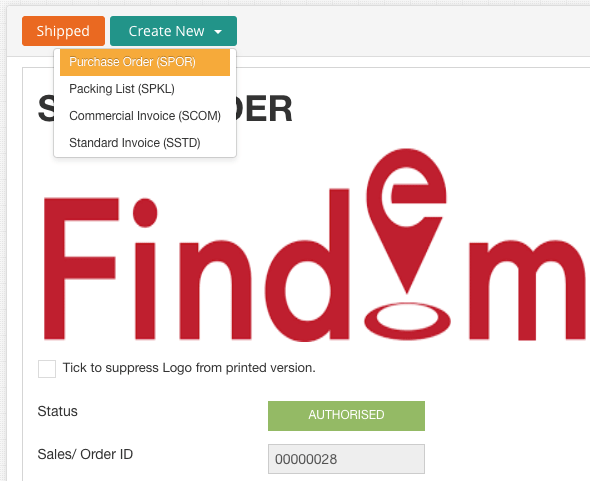
Creating Purchase Order(s) from an Authorised Sales Order
Once a Sales Order has been authorised, you’ve the ability to create associated Purchase Order(s).
- Open a Sales Order that has a status of Authorised and choose Create New > Purchase Order (SPOR),
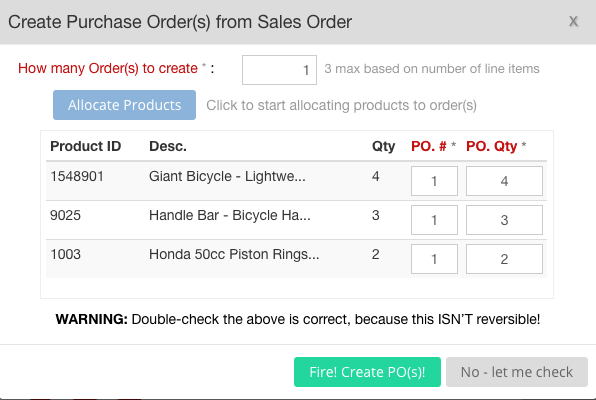
- A Create Purchase Order confirmation dialog box, which allows you to aggregate or split product line(s) from the Sales Order into one or more Purchase Orders.
- In this example, since we had 3 product lines, we could have created 3 separate Purchase Orders
- However, we have allocated all 3 products to 1 purchase order
- You do this by typing 1 in the How many Order(s) to create field and clicking the [Allocate Products] button. You could adjust the PO Qty to suit if required. Finally, click [Fire! Create PO(s)!] to create the Purchase Order(s)
- Separate Transport Scenario: What about if you have to create a Purchase Order for the goods and a separate Purchase Order (with a different supplier) for the transportation? As at 1 Jun 2021, EdgeCTP does NOT have this feature. The temporary work around is to create an additional/last Product Line item for the Transportation on the Sales Order (at zero value to the Buyer so as to not impact the total); create 2 Purchase Orders, with one for the goods and one for the transportation. Currently, Q3 2021 is planned to have this separate transport scenario properly handled within EdgeCTP
- The Purchase Order is created and saved to the Financial Documents dashboard
- On the Purchase Order click the [Jump to Docs] button to show the Jump to Doc dialog box, and click the Direction icon under Action for the Purchase Order
- Wait for EdgeCTP to close the Sales Order and show the Purchase Order in draft status
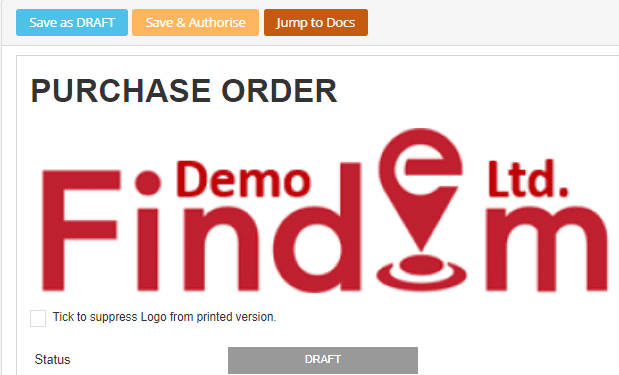
- Check the Purchase Order has been populated correctly. Specifically, make sure that the following are correct or adjust accordingly:
- Supplier: defaults to the lead supplier for the product(s) from the Stock Control entry
- Delivery location: should be where and when you are expecting to receive the goods
- Payment Terms: set these to the number of days agreed with the supplier (click + Set to add the default value from your Settings)
- Quantities: for each of the product lines, because they could be set to the minimum reorder quantities, as taken from the Stock Control entry
- Buy Prices: may be based on the last purchased cost/buy price as set in the Stock Control
- Accounts: if you’ve an accounting package connected, then the account to where the product cost lines will be posted should be set e.g., 300 Purchase/Cost of Goods Sold
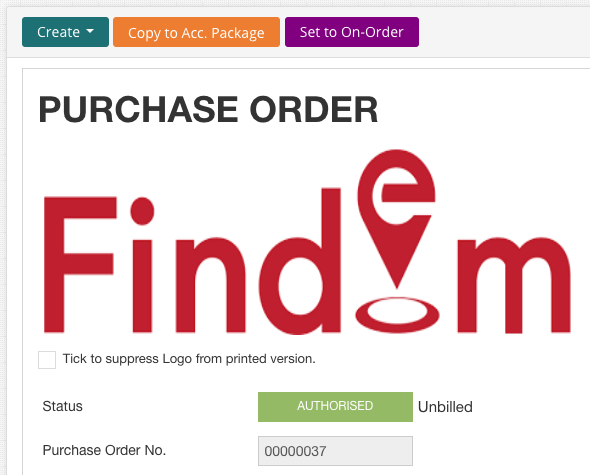
- Once you’ve confirmed that the Purchase Order is correct, click the [Save & Authorise] button and [Save] for the Confirmation
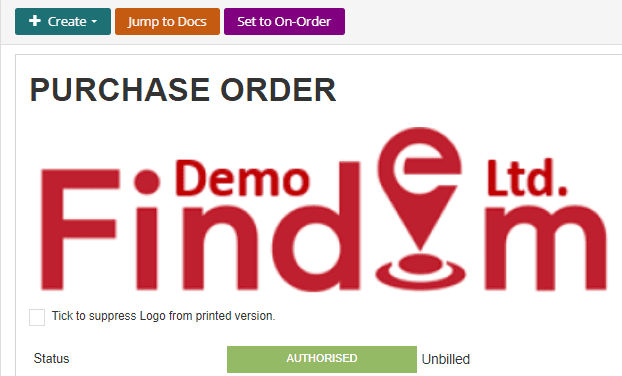
- With the Purchase Order in an authorised state, you can:
- Create – allows you to create Purchase Invoices (Bills) and send them to your accounting package too (notice the ‘Unbilled’ message next to the Status)
- Copy to Acc. Package – send the Purchase Order into your accounting package
- Set to On-Order – sets the Purchase Order to On Order and means you can process/tracks goods coming into stock associated with this Purchase Order
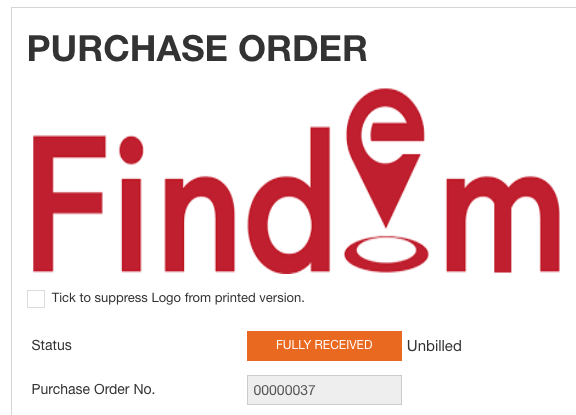
Track Goods Received for a Purchase Order
With an authorised Purchase Order, you can track goods to be received into stock. Please note if the stock on your Purchase Order is ALSO tracked by your EdgeCTP connected accounting package (e.g., Xero) then FIRST copy the Purchase Order [Copy to Acc. Package] to the accounting package.
- Open the authorised Purchase Order and click [Set to On Order] that will bring up a dialog box into which you enter the expected date + time the goods are to be received

- The Purchase Order status changes to ‘On Order’ and a Received button appears in the top left
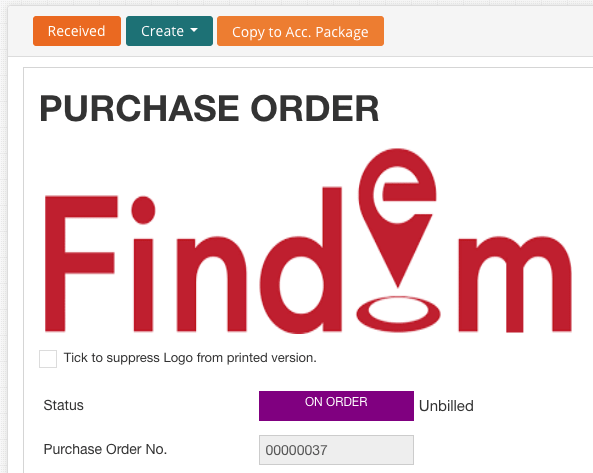
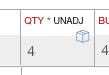
- When the goods are/have arrived, open the Purchase Order with a Status of ‘On Order’. If you only have one stock item to receive then click the [Received] button (top left). If you have multiple items to receive on the Purchase Order, then go down to the individual product lines and click the Quantity cube icon next to product line
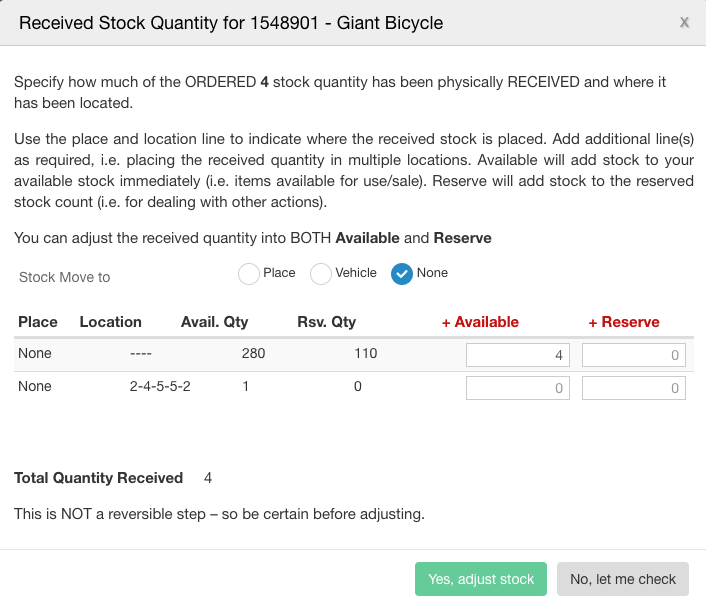
- Identify where the received goods will be held (location); quantity added into Available or Reserve and then click [Yes, adjust stock] to reflect the stock being received
- Once you return back to the Purchase Order the individual Product Quantity Lines and their status (part received or fully received) is reflected accordingly. The status of the Purchase Order is also reflected

- Repeat the above steps for ALL the remaining product lines on the Purchase Order, until all the items are received, and the status of the Purchase Order become Fully Received
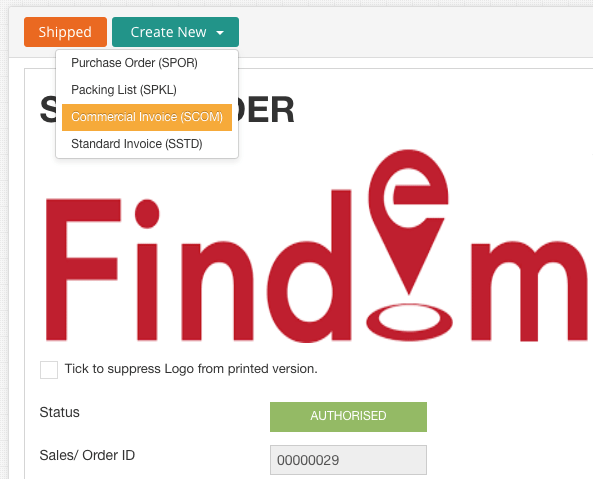
Creating a Sales (Acct or Comm) Invoice from a Sales Order
With an authorised Sales Order, you can generate the relevant Sales invoices, whether Accounting or Commercial.
- Open the authorised Sales Order and click [Create New] > Standard Invoice or Commercial Invoice (for international trade)
- If your Sales Order comprised of a number of products, then you can split or aggregate the products across a number of invoices, up to the maximum number of products you have. In this example, all 3 products have been placed on one Commercial Invoice
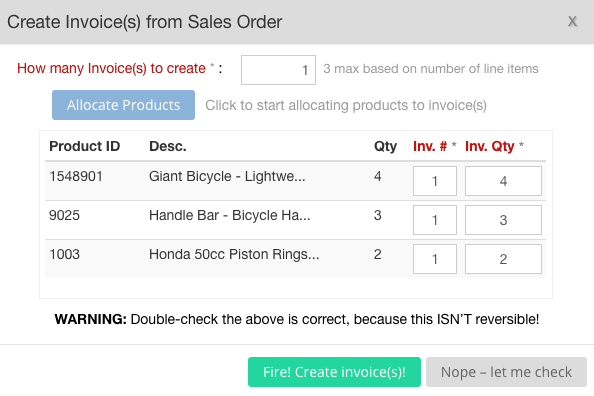
- Click the [Fire! Create invoice(s)!] button to generate the invoice and save it to the Financial Documents dashboard
- Once EdgeCTP returns, on the Sales Order, click the [Jump to Doc] button, and click the Invoice’s Action > Direction icon to switch to the Invoice
- The Invoice appears in a draft status. Check all the relevant fields and product(s) are correctly populated. Check for each product line the accounts are correctly set to post to a sales account. Then click the [Save & Authorise] and then [Save] to confirm to set the invoice status to Authorised
- Once the Invoice has been set to a status of Authorised, you can then Copy to Acct Package the invoice
- Subsequently, you can Email the desired layout PDF to the buyer
- Finally, you can create a Packing List from the Invoice for sending goods the Buyer and track despatch from the Packing List